Thursday, 14 February 2013

School Series ~ Organize Me! Filofax Edition

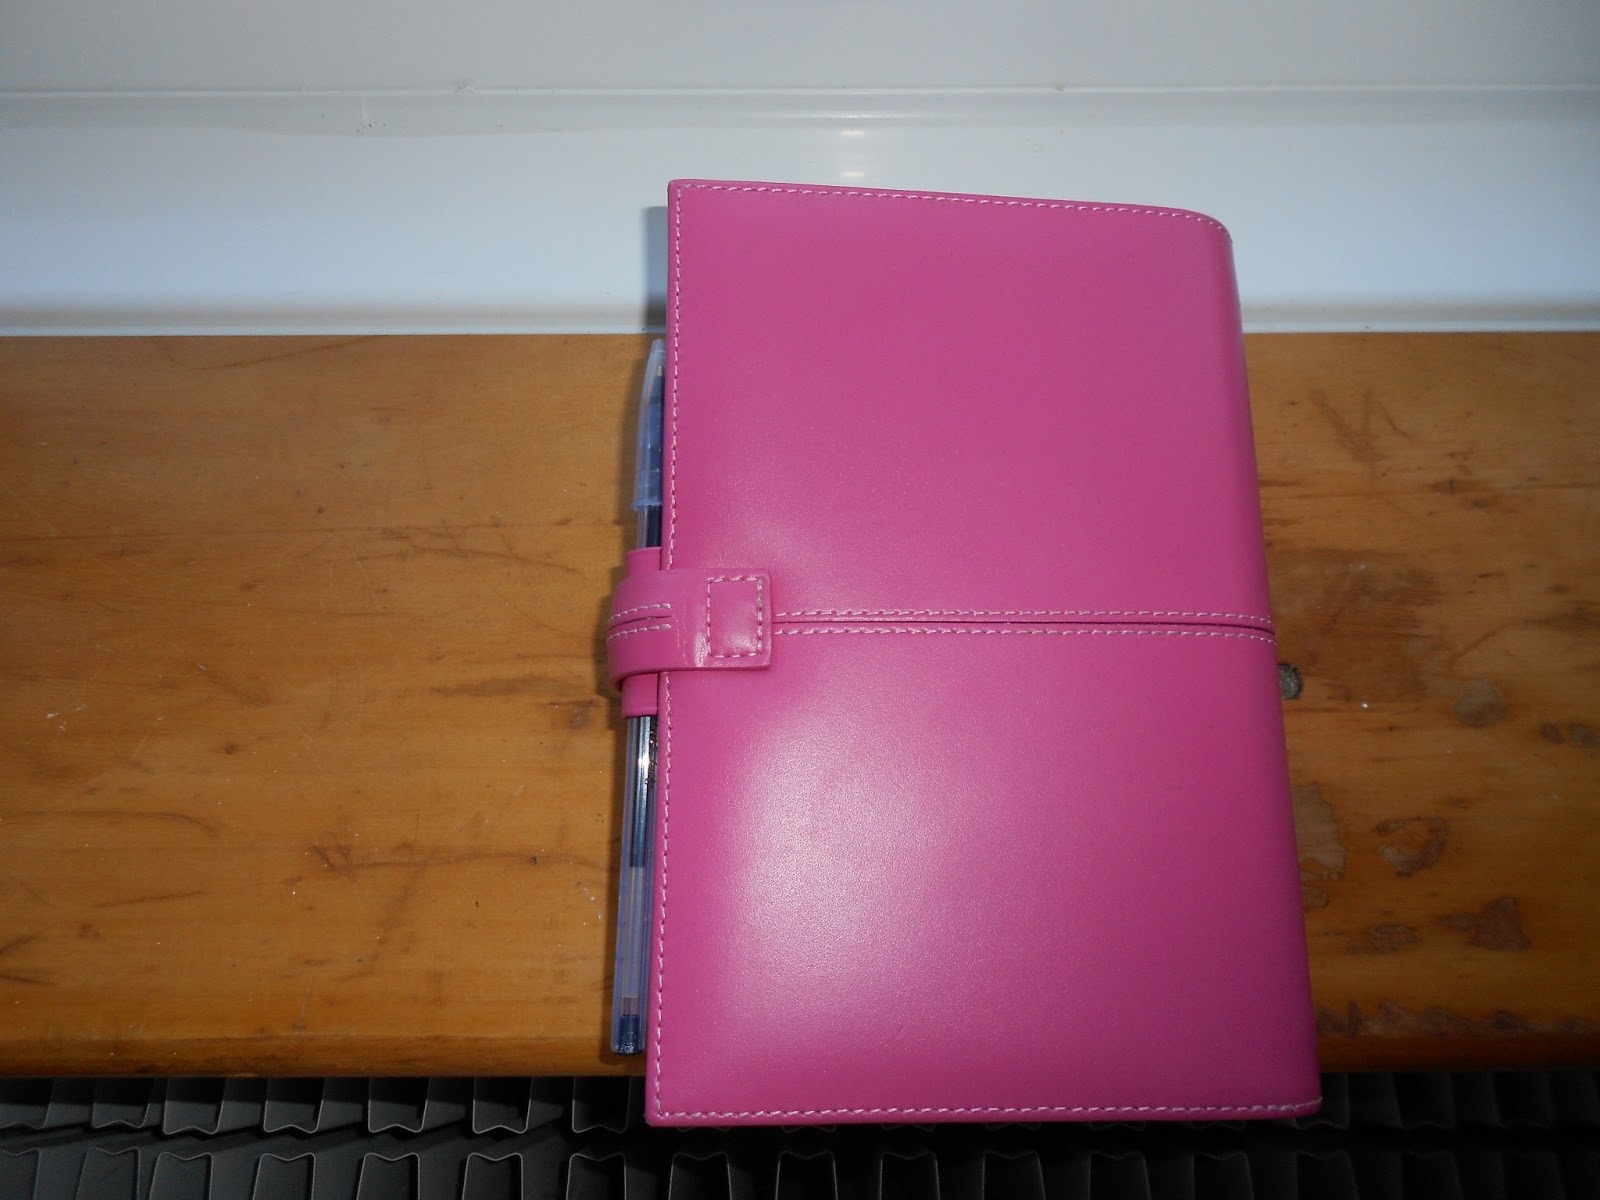
I have tried soo many different organisation techniques and diaries and I've finally succumb to Filofax. This brand seems to be known worldwide, you only have to Google Filofax and hundreds and hundreds of videos and blog posts come up!


So let me introduce you to Bella!

She is a Classic Italian Leather in personal size. The personal size is your typically diary size that you can find in any Whsmith's, Ryman's, Tesco's, anywhere really! I got mine as a birthday present for my 20th Birthday from my Auntie and she purchased it for Whsmith's for around £35 but it is originally £80. I couldn't find the link on Whsmith's for the one I got but I did find the new season colours from Filofax here but you can find them often on sale at Whsmith here. 


When you first open it there are card slots where you can store cards or post-it's and then a big pocket at the back, which I actually just use to hold to post-it note markers. On the plastic flyleaf I actually keep two different post-it notes, the top one I keep for lists for anything I want to buy/try out and the heart post it I use to note down people's address or phone numbers or generally everything else that's not a list!

As you can see on this picture you can see the beginnings of a picture, this is actually the credit card holder that comes with the Filofax. I am in the process of filling it with pictures to make the opening on my diary cheerful, especially as I move out in a couple of months and I may get home sick!


Next is my month at a glance, in here I put any appointments (medical, interview or otherwise), paydays and assignment checks for college. As you can see these are all colour coded, 
college=Orange, 
appointments=Pink, 
work=Blue. 
I also circle the days I'm off college on term-time holiday (or school holidays), then I can flick to the month and see okay I've got this many days holiday this month, this helps when it comes to picking up extra shifts in my part-time job! I also circle the days I have exams.


Now for my day-to-day planning I just use the week on two pages diary that came with the Filofax. The layout works for me personally, it feels just like my previous diary though I like this one better as the previous had check boxes but only had 5/6 per day making not always useful. My old planner was covered in post-its with to-do lists on cause I ran out of space, however I can fit everything I need to write in the little boxes of this diary.

As you can see I use the colour coding system throughout my diary, I originally used highlighter in my old one but I have switched over to colour pens that I brought from Tesco, any coloured pen will do! I then shorten the word down to allow more space, e.g. Health Studies becomes HS, Biology becomes Bio, Study Skills becomes SS then I write the actual task in black pen and scribble it out in this fuschia coloured pen from Z-Grip so I know what items I have completed that day but I can still see what the actual thing was!


Behind the Filofax ruler you can see the little task list I put in each week (these are not Filofax to-do list), I printed these off the internet here and I just put them in the middle of the two pages and keep a note of any little things I need to do and then just carry the list on to the next list till the full page is filled and then I replace it (I've put in an example one, as my own one had some personal info on it)


In the note section I just keep extra task sheets paper-clipped together with the cutest heart paperclips that I got from Accessorize in September but they don't sell them anymore! Behind that I keep graph paper that I cut to size to use as to-do lists, I did that before I downloaded the task sheets, they now stay in as back-up to-do lists. I then have the actual Filofax to-do lists paper-clipped (again!) but I use these for any group projects for college, so I can keep track on who has done what and when and then I just have the Filofax lavender note paper at the very back as a J-I-C (Just In Case)


The first page in my project tab is my goal list for 2013, these are all the things I want to achieve by the 31st December 2013. Then it's the fun section, you all love! The Blog section. I have a page for blog post ideas/if you guys want to request any specific blog posts, they go here and behind that I keep 'Daily Action Plan's' which are really for when I write blog posts, I fill one of those out. It has a schedule section, projects for the day, support tasks, unplanned tasks (I don't use this section), and notes. These come in really handy as I can plan ahead of time which I love and I can make sure I've done everything!


Next is my health and fitness section, one of my goals for 2013. I am going to try planning my meals ahead of time, I'm hoping it will encourage me to try out some new recipes! Behind that I just have my workout routine (I may do another post on this!), in this paper-clipped section I also have a weekly tracker for my measurements as I am not going my weight I'm going by inches. Behind that is just the information section which holds my registration number and usual information that comes with diaries!


I am attempting to keep track of all my spending, in a hope I can build up my savings more over the course of this year. I've keep in the financial log pages in the section after health and fitness and I've also put notepaper behind for numbers etc for banks and direct debits. I also put my savings log in, I've put an example in of one (personal reasons/safety why I'm not putting my actual savings log page and showing you the page with all the numbers on, hope you understand!)

The last section I haven't filled out as of yet and that is the address section, I also have the web address pages here to keep track on any cool blogs I have read (I'm always forgetting them, then spend ages tryna find them again!). I've left the address pages in because I need to keep track of my numbers as I just keep them on my sim and several times I've had to have my phone rebooted resulting in me having to go round asking EVERYONE for their number again.

And that is my Filofax guys!

Elle
xoxo

Thursday, 31 January 2013

LUSH Liverpool Grand Opening

*Edit* I did write this before Christmas but due to using a new camera to take the pictures of the opening, I didn't actually know how to access the camera photos without the software!

Before Christmas I was lucky enough to be invited to the opening of the new LUSH store & spa in Liverpool. They had a VIP event the night before the event which I was originally invited to but I had to work! :( Boo! So they were nice enough to let me come down the next day and blog.


They have moved the store to Whitechapel (by the Met Quarter) which is a much bigger store with a new spa included upstairs which the old store never originally had. On arrival you were welcome by plates of mince pies, a perfect treat for the all day - last minute Christmas shoppers and we were serenaded by an amazing female singer who I will try to find out her information for here of course. It was a lovely change having a in the flesh singer as opposed to P.A music, which most shops tend to have practically the same C.D on repeat so it was very refreshing when you went in to hear that.


Inside the products were much more laid out with the shop being twice as big as the previous location. Cue the wall o' presents!


As a result of having more space there of course meant there were more of the world's most brilliant sales assistants who don't talk to you like your a customer but make you feel like your going shopping with your friends, which is sooo much better! And with that, Hi Hannah! :) Now of  course with all the friendly staff there is of course bags of help and you are never stuck for ideas with them around! Each of the products now have they're own little home and there is also more sinks which also means more demos!!! Every staff member I talked was also super excited that they've actually brought the fresh face masks onto the shop floor meaning they can get your face mask in two secs and they don't have to traipse up and down staff to get them (from the point of a current sales assistant whose stock room is off-site -meaning it's not connected to the shop- having to run up and down stairs all day is never fun!). My only jip is the location of the soaps. They are located either end of the tills and while that's a really good place to get additional add-on's with customers (that's the sales assistant in me coming out) they are not the most shop-able place. When I was there the majority of the customers seemed to think the store is one-way which meant that if you wanted to look at the soaps it can become quite difficult and crowded. My tip - head straight to the soaps!


Now onto the bit your probably all looking forward to............The SPA!!!

The spa is very cleverly 'hidden' upstairs which makes it nice and secluded and relaxing, perfect for massages! As you walk upstairs you feel almost like you've walked away from the city and into a lovely countryside house and it helps that the entire upstairs was lit by tea light candles and not bright shop lighting.


Now the spa is split up into several different sections, there are of course the treatment rooms which I shall tell you about a bit further down. There is then a lovely comfy seating area and the kitchen which looks like its been modelled after a real country kitchen, this is where you actually have your consultations with your therapist and then this is also when you finish off your treatment.


Let's get onto the good stuff. The treatment rooms! 

There are 4 different treatment rooms in total, all of which are specific to different treatments. I was lucky enough to get to view 3 of them as a lucky individual was getting a treatment in the 4th one. Each room is dimly lit which helps in creating the perfect relaxing atmosphere and each room have different features unique to each treatment.

My favourite room was the double treatment room in which they actually memory foam massage beds with heated blankets....that sounds amazing on its own but they also play covers of music in there, including Charlie and the Chocolate Factory. This is actually the room for the new comforter treatment which you can get done with anyone you wish mum, sister, hell even your boyfriend if you really wanted to! I will right more about the treatments below.


They also mentioned during my tour that each treatment takes 18 months to develop to make it perfect and ready for people in the spa's. They are also currently working on a treatment in which they use a really old fashioned claw toed tub (if that's what you call them!), More from that when it comes.


There are currently seven treatments available in the spa with varying prices.

  • Tailor Made is the cheapest option at £40 and is a 30 minute customised version of the Good Hour massage which targets your problem areas.
  • The Spell is a hour long treatment at £55 which they market as a 'Magical treatment' which releases tension in the body and calms the mind through a foot massage.
  • The Comforter treatment which is currently the newest treatment also lasts for an hour and costs £65, as a part of this treatment you are given a hot chocolate body scrub followed by a massage using rose oil, perfect as mother's day presents for that special momma!
  • The Lush Sound Bath is the same length and price as the comforter but is much more of a meditative treatment which allows you to focus deeper within and listen to what is going on around you.
  • The Validation Facial is a hour long facial which costs £75 in which the all natural facial aims to change the way you feel from the inside out.
  • The Good Hour is a full body, deep tissue massage (which sounds like heaven) which lasts for 70 minutes (sounds even more like heaven) which takes on a being at sea point of view. This in total costs £80.
  • Synaesthesia is LUSH's most expensive treatment costing £125 for an 80 minute full body massage, but it also LUSH's signature treatment. This one amazed me the most as it is tailored depending on what the first word you pick off a board is. It also contains scented oils in dry ice which leave your skin scented! That alone would tempt me to get it.
Full descriptions of the treatments can be found on the back of the spa postcards which you can get from any member of staff.


I really enjoyed visiting the new LUSH store and spa and I will definitely be visiting very soon. I am actually thinking about getting a treatment at the end of the month for my birthday so I will be sure to blog about that if I get one!


Elle
xoxo

Monday, 10 December 2012

Update + Latest Youtube Video ~ Lush Christmas haul 2012

Yes I know I've been away for a SUPER long time and I do really apologise! I haven't really mentioned this a whole lot but in September I started a Access:Health course to kind of aid my journey into university to become a registered adult nurse. 

If you've never done a access:health course or you don't know what it is, basically in my college the course is divided into Biology, Sociology, Health studies and Study skills. I study from 9am-5pm Tuesday and Wednesday, while having a part-time job, doing my voluntary work, doing all my assignments, completing the 2 hours study every night to get a distinction in every topic and basically trying my hardest to have a social life.

To put it in perspective I am a very social person, I normally see my external family (e.g. the family I don't live with) every two weeks if not every week. My course is that ram-packed that last weekend was the first time I got to see my external family since AUGUST guys! I am starting to get into a firm routine of getting my school life and social life in order, so I am starting to feel less stressed which is good for me and it's good for you guys cause I can start filming and blogging again!

I will be coming up to Christmas break soon (well in two weeks) so I am going to try making a 'store' of videos and blog posts, so that if i have an insanely busy week with college I can at least get up a video and blog post every week (I've decided that's going to be my new year's resolution guys!)

So for now I'm going to post my latest video (to date) that I've posted. My LUSH christmas haul!


P.S. I am going to a special opening of Lush Liverpool's new shop so I will be blogging about and possibly even try my hand at vlogging the experience, so keep your eyes pealed!

Elle
xoxo

Sunday, 19 August 2012

Going to University Series

Hi guys,

Just a quick post to let you guys know that I am going to be starting my Going To University Series again, as I am going to apply again this year. I originally had to stop the series as my grandmother got seriously ill and I had to help take care of her. I am taking this series seriously now as I have emailed UCAS to ask their permission to make sure it was okay to film parts of their website so that I can show you accurate bits of information, instead of just me infront of the camera speaking and speaking! :)

So far in the series I am planning to do~
~An introduction video (which is featured below)
~Students applying in the UK
~Non-UK students applying
~Step 1 - Choosing your courses
~Picking your uni
~Writing your personal statement
~Open days VLOG
~Deadline dates
~Step 2 - Applying on UCAS
~Student Finance (Loans, Grants etc)


Let me know if you guys would like to see anything else in this series, this is just a so far list of planned videos!


Friday, 4 May 2012

Tip Friday #3 ~ Stained Nails? Not any more!

Right I promise you that the next tip friday is not going to be a nail post, I'll be mistaken for a nail polish blog soon! This tip I don't take any credit for I learnt it when reading one of the many fashion magazines. So onto the tip!

Now I've noticed that my nails have gotten stained lately from bright or dark nail polishes and I mean stained in the manner that when I take my nail polish off, my actual nail is like an 'artifical' yellow-ey colour on the top half. You know what I mean if it's ever happened to you, if not here's a picture to show you what I mean.
The trick that I learnt to get rid of them involves lemons and baking soda. Take a bowl or a little dish (I generally use a teacup dish) and mix one teaspoon of lemon juice with one teaspoon of baking soda, once I've applied it to every nail I personally like to leave it a couple of minutes. After the couple of minutes I wash my hands with soap and warm water and I find that it's one of the easiest, quickest ways to get rid of the yellow stains that are left behind from dark nail polishes!

New filming/blog schedule on the way soon guys, it should be hopefully in full effect starting monday!


Saturday, 28 April 2012

Tip Friday #2 ~ Nail Polish Mistakes

Welcome to the second Tip Friday, last week I talked about the different uses you could get out of your nail polishes. This week's tip again is going to be nail related (I'm sorry, don't shoot me yet!). Now I'm not too bad with painting my nails but I can often make mistakes, go over the line or when trying to paint with my left hand things can just go plain wrong! I've been doing this when I do my nails for months, but it's recently come out in Bella magazine so it must'nt be wrong. 


So when I'm painting my nails I always have a little cap full of nail polish remover on the table, this is for when I make the dreaded mistakes. Now I've tried taking it off with a cotton bud soaked in nail polish remover but the extra cottony bits seem to come off and stick to my nail polish, very annoying! Moving swiftly onto my point, when I was younger and first getting into make-up I was bought one of those cheap 32 piece brush sets from ebay, granted a couple of the synthetic brushes weren't half bad but I ended up with a couple of lip brushes and short little synthetic brushes, so I decided to use one to fix my nail polish mistakes!


For instance when I've made a mistake on my nails. I take one of my old nail brushes and dip it in some nail polish remover and the gently rub it over the smudged nail polish, and then I wipe the brush off onto a piece of tissue or kitchen roll. I found this has given my nail a more polished look and wiping it straight off onto the tissue prevents the brush going hard.


Note: I do use a synthetic brush for this otherwise I'd worry that the bristles of a normal make-up brush would just go hard and become useless!


Check out my last video here (link for lush favourites)

Tuesday, 24 April 2012

My Top 3 Skincare Favourites

I think this is the first skincare post I've done on my blog, I did do a skincare routine video on my channel but it is from ages ago and my routine has changed. Today however I'm not gonna talk about my routine, I'm going to talk about my favourites out of all the skincare products I've used. 

So it's probably should tell you about my skin now right?! My skin is overall very dry with it every-so slightly oily on my chin and around the sides of my nose. I am still a teenage so I still get the annoying spots like every teenager but I mainly get them on my chin which is pretty manageable! Now I will say some of these aren't perfect, for instance I'm still hunting for the perfect moisturiser to get right of my dry patches, but this is what works for the minute.
Now this is my favourite facial scrub that I use as kinda like a face wash and facial scrub. This is the St.Ives Fresh Skin Apricot Scrub, this is the invigorating one but I do believe they do them in all different types of same scrub but just ones for like more sensitive skin etc. This one does actually say that it is suitable for all skin types but I will mention that it is quite harsh, so if you find you have more sensitive skin then I'd try another one. The exfoliants in this scrub aren't like the little beads they are actually mini bits of walnut shell. St.Ives actually reccomend that you use it for 3 to 4 times a week but I do use it every other day and use my LUSH fresh pharmacy on the other days. I only got this a couple of weeks ago but it's already become a staple for me as it's helping to improve my overall skin tone. These facial scrubs have been very popular and you can get them from Superdrug, Boots, Tesco, Asda, even Home & Bargains (where I got mine), basically anywhere that sells skincare products. I definitely think it's worth a try at less once in your life!
You may or may not know but I don't use make-up remover wipes to take off my make-up, mainly cause I heard it was bad for your skin to use them on a regular basis. Granted I still do use them occasionally when I'm too lazy to take of my make-up properly and I just wanna get into bed and go to sleep. But most nights when I came be bothered to do it properly I use this, Garnier Soft Essentials Complete Cleansing Milk with rose extract. This is the one for dry and sensitive skin and they have different extracts for different skin types as well. Now this is sensitive for you to use on your face and your eyes and I have even in a clutzy, half-drunk moment got this in my eye and it literally does not even sting and I am not exaggerating at all! I just put this on a face cotton pad and dot some on my cheeks, forehead and chin and then I start to rub the cotton pad over my face and the make-up just comes right off. I find these less abrasive than the facial wipes and I find it actually takes WAY less time to take it off than with facial wipes!
This one I actually don't have a 'live' picture of it as it's actually a fresh face mask and I tend to get it every other month because you only get so many weeks to use it and then expires as it's made with completely natural ingredients. It's Cupcake Fresh Facemask by LUSH, now this is the one for supposed to be for younger skin and those who are new to the lush face masks. It contains cocoa powder, spearmint oil and vanilla absolute to help with spots. When I have this face mask I tend to use it 2 or 3 times a week to kinda use it up because a little really does go a long way and for £5.75 for a face mask that expires after just under 4 weeks, it is a little expensive but I find when I use it feels really moisturising and my skin feels really soft and smooth again so I definitely love it and it is one of my staples that I regularly buy and literally can't stop reccomending it to people! Just a little note: go with what you want with the fresh face masks or ask for a sample (my sample I got enough for two uses) because the one the lovely lady in my Liverpool LUSH reccomended to me I found didn't actually do that much for my skin or my spots but she gave me a sample of this at the same time and this worked wonders compared to that one (I think it was blueberry one!).

What are you top favourites for your skincare? What do you keep repurchasing?

Sunday, 15 April 2012

Spring Nail Polishes

Now I don't stick to seasonal colours for my nails. For instance if I feel like wearing a light colour in the winter I will and if I feel like wearing a darker colour I will. Working in Monsoon we have stricter rules about nail colour and wear, we are for instance not supposed to have chipped nail polishes and we have to complimentary colours on both nails and toes to match our outfit. We are allowed to wear sandals and wedges in the summer do we do have to keep on top of the nail trends, the fun of working in a fashion shop eh?!
Now in no particular order ladies and gentleman, the nail polishes!


First is this lovely mint green colour by Barry M. These only cost £2.99 in Superdrug and almost always on 3 for 2, so what more of an excuse to do you need to go and try a couple of them! I got this last spring when it came out because I loved the colour and it was one of my go-to nail polishes for spring & summer and it's still one of my favourites this year! I've just started to wear it this last week for the first time this year and I am loving it. The polish itself is a lovely cream finish and is a more on the lighter end of mint green which is greater for you lighter skin tone guys like me but I think it'd look gorgeous on dark skin tones, so it'd make a great universal shade!
Now onto lasting power with all my nail polishes I use either my OPI top coat or my Rimmel 5-in-1 top coat and base coat. Now I am very hard on my nails in the manner that I use a touch-screen till at work so my index fingers are usually the first to show signs of chip, still on the hunt for a 'perfect' top coat, seche vite's topcoat is next on my list! I do find this nail polish lasts at least three days before chipping and that is three days of being banging on a screen and ripping open boxes, packages and wrapping, so it'll last much longer if your not as harsh on your nails as me!
Next is a shade I use on my toes more than my nails but come summer and the sunshine I wear it then. The shade itself is Sugar High by China Glaze. Not this is a great bright colour not to be mistaken for neon or highlighter pink. This is not neon it's simply a bright shade of pink! This again is a cream colour, don't know what it is with me and creams! But I think if this one was a shimmer or a glitter, I don't think I'd be keen on the colour as much. Now I don't know how much these retail for as I didn't personally buy this, I got this as part of a contest prize from Karen. I think China Glaze generally retails for around £12 but you can often find them cheaper at places like 8ty8 beauty and transdesign (note: I have never ordered from any of these sites so I'm unaware of any shipping or customs charges!)


I find when I apply these to my toes they last about 5/6 days with no top coat but I have been wearing boots and trainers a lot for running/workouts/gym and for work, so the staying power might change once I start wearing sandals and wedges.
This little beauty is actually an Accessorize metalized nail polish in the colour Gem. These little bottles only cost £4 which is a lot compared to brands like Barry M who only charge £2.99 for their polishes but I will admit and I am not ashamed to admit that I buy them from work cause I get them half price with staff discount, but honestly if I didn't work there I'd still purchase their 'effects' polishes just because I think they're worth it!


Now this is marketed on the bottle as being a one coat polish and I completely agree. In this swatch picture I have only applied one coat and you get a perfect opaque colour and they dry super fast compared to other polishes, faster than some of the marketed fast drying polishes! Perfect for those of you who don't have bags of time to do your nails.


The colour in the bottle is a gorgeous shimmery mash-up of pink and purple and on the nails the colour doesn't disappoint, you get exactly what you see in the bottle! Now for being one coat this last ages! I've worn it for a whole week without a top coat and only had a slight bit of chipping at the tips and I find it lasts even longer with a top coat. This a perfect nail polish for a day-to-night look because it instantly glams up any outfit and gives it that overall polished look without having a French manicure. Why not try something a little different and do a French manicure with a nice metallic colour like this on the tip?!
Keeping with the pink theme I seem to be on is this little polish from Barry M (I'm starting to see a trend here!). This is bright pink (279) which only costs £2.99 which is great little bargain buy or even just something to spend your pocket money or that spare bit of change on! Now this is not as bright as China Glaze's ' sugar high' and is just a lovely bright pink, perfect for those of you that are of paler skin tone like me (I swear you could mistake me for a milk bottle!) I must definitely be having a creme trend for nail polishes this spring bar the Accessorize one! Now this I love wearing it on its own or with my crackle polish over the top when I'm feeling that bit more adventurous. The colour itself is a blue toned pink which applies opaque in two coats and dries fairly fast compared to other polishes. Now this lasts me 4-5 days with slight chippage and that's 4 days of it being banged against the tills in work, being under water in the shower or when I wash my face morning and night and also from being in the swimming pool almost daily. So it staying power is quite impressive!
Next is this beautiful coral colour again by Barry M which is simply just called coral. Now I will say its a bit more red-orangey in person but it for some reason photographed differently! I blame it on the lack of flash on my iPod :) This like the other Barry M nail polishes lasts around 4-5 days. I will say thought that I haven't used this one a whole lot mainly because I've forgotten about it! But now the sun's coming out more I'm definitely starting to reach for it, to me it's just the perfect coral colour with it having needing only two thin coats to reach the opaqueness in the picture and it lasts for days.
Next I've been loving this concrete grey colour by collection 2000 called wham (number 27) and it is just a mid toned grey creme polish, these hot look nail polishes have probably been out roughly a year and I love them. I have a couple of colours from the line and you only need two coats to get the opaqueness in the picture! Price wise I don't actually think they cost a whole lot, roughly £1.99 or £2.99. I find its a great unique colour for spring if you want something a little different, I often add glitter or effects on top to change it up. The staying of these little bad boys is around 4-5 days depending on how heavy handed you are. Definitely worth a shot though!

Next is my perfect everyday no fuss colour, this by the brand 17 (you can buy it in boots) in the shade Forever. I think these little pots retail for around £1.99/£2.99 and it only takes two coats to get the desired look in the picture. This is a lovely pinky nude colour, perfect flesh tone colour! This'll be great for a range of people cause this doesn't actually wash me out, which is great. I often use this as an underneath colour for a French manicure and it worked out perfectly (I did a blog post on it). This polish is one of those shades that I'll always have in my collection as the colour doesn't clash with anything so I don't have to worry about repainting my nails!


Now with two coats and a topcoat, I found that it lasted at least a week before I started to get some chips, at that point I got bored and wanted to change my nail colour so it could of lasted longer because it was only slight wear and tear at the tips! Would definitely recommend for you all to have a nail polish this colour in you collection at all times and for pennies, this is probably one of the cheapest of the best!
This is probably one of the cheapest of the whole bunch, this is just a kind of all year favourite but I wanted to include it in this. This is by E.L.F and it's one of they're glitter polishes with the clear base whereas they have some that have actual colour nail polish bases. You can get these at E.L.F for £1.50 and that's ANY of their nail polishes for £1.50.


I use this one as a little added effect on my nails, I'll either put it on my ring finger of both hands or put it on the tips or just all over the nail (I've actually got an idea for an effect with this nail polish if it works!). I've actually found that the nails that I put it on they are often the last fingers to chip and they generally last about 5-7 days depending on what your like with your nails, I generally get 6 days out of it! For £1.50 it's always worth a try and if you don't like you haven't wasted a whole lot of money because some of the glitter polishes can be quite expensive (you could even possibly make your own! Possible future blog post there!)


So there's my favourite nail polishes this spring, I would love to get a nice yellow colour and a lilac and pastel pink (probably don't need that many pinks tho!)


What are your spring favourites?